Here is the calendar I made for January 2013 for my co-worker's deployed husband. A picture is placed in the slot behind the calendar and each day you lift the flap and reveal the picture.
This is the front and back before I taped them together, add eyelets in the corners and black and white baker's twine for hanging. The snow flakes and snowman were cut from "Christmas Cheer" Cricut cartridge. I also used Designer Calendar and Beyond Birthdays (I think) for the phrases.
I cut the 3" snowman entirely out of white cardstock and then used Distress markers and colored the little layer pieces (before removing any paper from the cutting mat). That way, I don't need to have all the colors I want in paper--I create them. I used tiny google eyes and buttons for the eyes and well, buttons. The tiny blue bird on the snowman's hand is cut from a sculpy.
The evergreen bough is a Tim Holtz stamp and I Glossy Accented a real pine cone to it.
I used Scrabble letters for the "SNOW" Red and clear bling and some Stickles.
Here is the ornament I made for my co-workers this year. We don't give each other 'gifts'; rather we pool our money and give to a worthy cause. This year we have chosen "Heifer International". If you don't know about this program, please follow the link and learn about this special way to help people in need.
I cut all the shapes from Elegant Edges Cricut Cartridge; the snowman is from a jillian vance design stamp set and I used Distress Markers to color the snowman. One red bling for the holly berries, some foam squares and red and white bakers twine were also used. The largest shape is 2 1/2"
Here is a picture of this year's gift tag is cut at 2 1/2" wide
The Santa is a corner from a LaBlanche stamp and the tag is cut from the Preserves Cricut Cartridge. I added some red and white bakers twine as well.
I have a chocolate covered pretzel for each to go with the ornament and gift tag.
Here are some gift tag enveloped I also put together.
I recycled this 4 foot wreath that I have had for some years now and last year the bow literally fell apart when I touched it. So I removed all the old yucky decorations and added new for about $20. I've seen large wreaths like this and they go for like $100!
Here is a video explaining what I did.
This picture was taken five days after I put it up. Glad I got it up before this happened; might not have crawled up there to put it up.
Here is my 2012 Christmas card that I am mass producing. I am making 80 cards this year. Last year I made 65 and found myself putting more cards together. I'm posting a video on YouTube and will post it here.
Here is a picture of the card to my Secret Santa Swap partner. Can't tell you who it is. Santa is cut from Circut Christmas Cheer cartridge as well as the circle tag. Martha Stewart paper, glossy accents, stickles, pop dots and an action wobble were all used.
Thanks, Amy
Thursday, November 1, 2012
Update November 9th
The Cricut Mini arrived. Unfortunately, I received two USB cords and no power cord. It's in the mail and might be here Saturday but for sure on Monday. Thanks, Amy
Cricut Mini Personal Cutter
I just ordered my second Cricut. I have a Cricut Expression and love it, but I want to use Cricut Craft Room (www.cricut.com/craftroom). If I link my Expression to the Craft Room, I would not be able to use Sure Cuts A Lot (SCAL) software with the Expression any longer because there is a firmware upgrade that is not compatible with SCAL (I'm sure on purpose by Cricut). Note: Cricut Craft Room only uses Cricut Cartridge images. Sure Cuts A Lot uses any other shape or picture you want but does not link to any Cricut images.
Because I still want to use SCAL, I purchased the mini personal cutter to use with the Craft Room. I chose this model for a couple of reasons; price ($59.99 including shipping), size (it is fairly compact) and the 8.5 x 11" cutting mat size. The original Cricut has a cutting size of 5.5" by 11" The Expression has a 12x12 mat). I like that I can use letter size card stock because that is what I use the most.
Cricut Craft Room is a great tool because you have flexibility with your images and you can work on setting up projects anywhere as long as you have an internet connection.
I finally put together the t-shirt quilt I promised my brother some years ago. I used 18 different t-shirts, iron on interfacing, iron on bonding, and stitched it all together with a satin wide blanket binding. I will be posting a YouTube video with details on how I put this together.
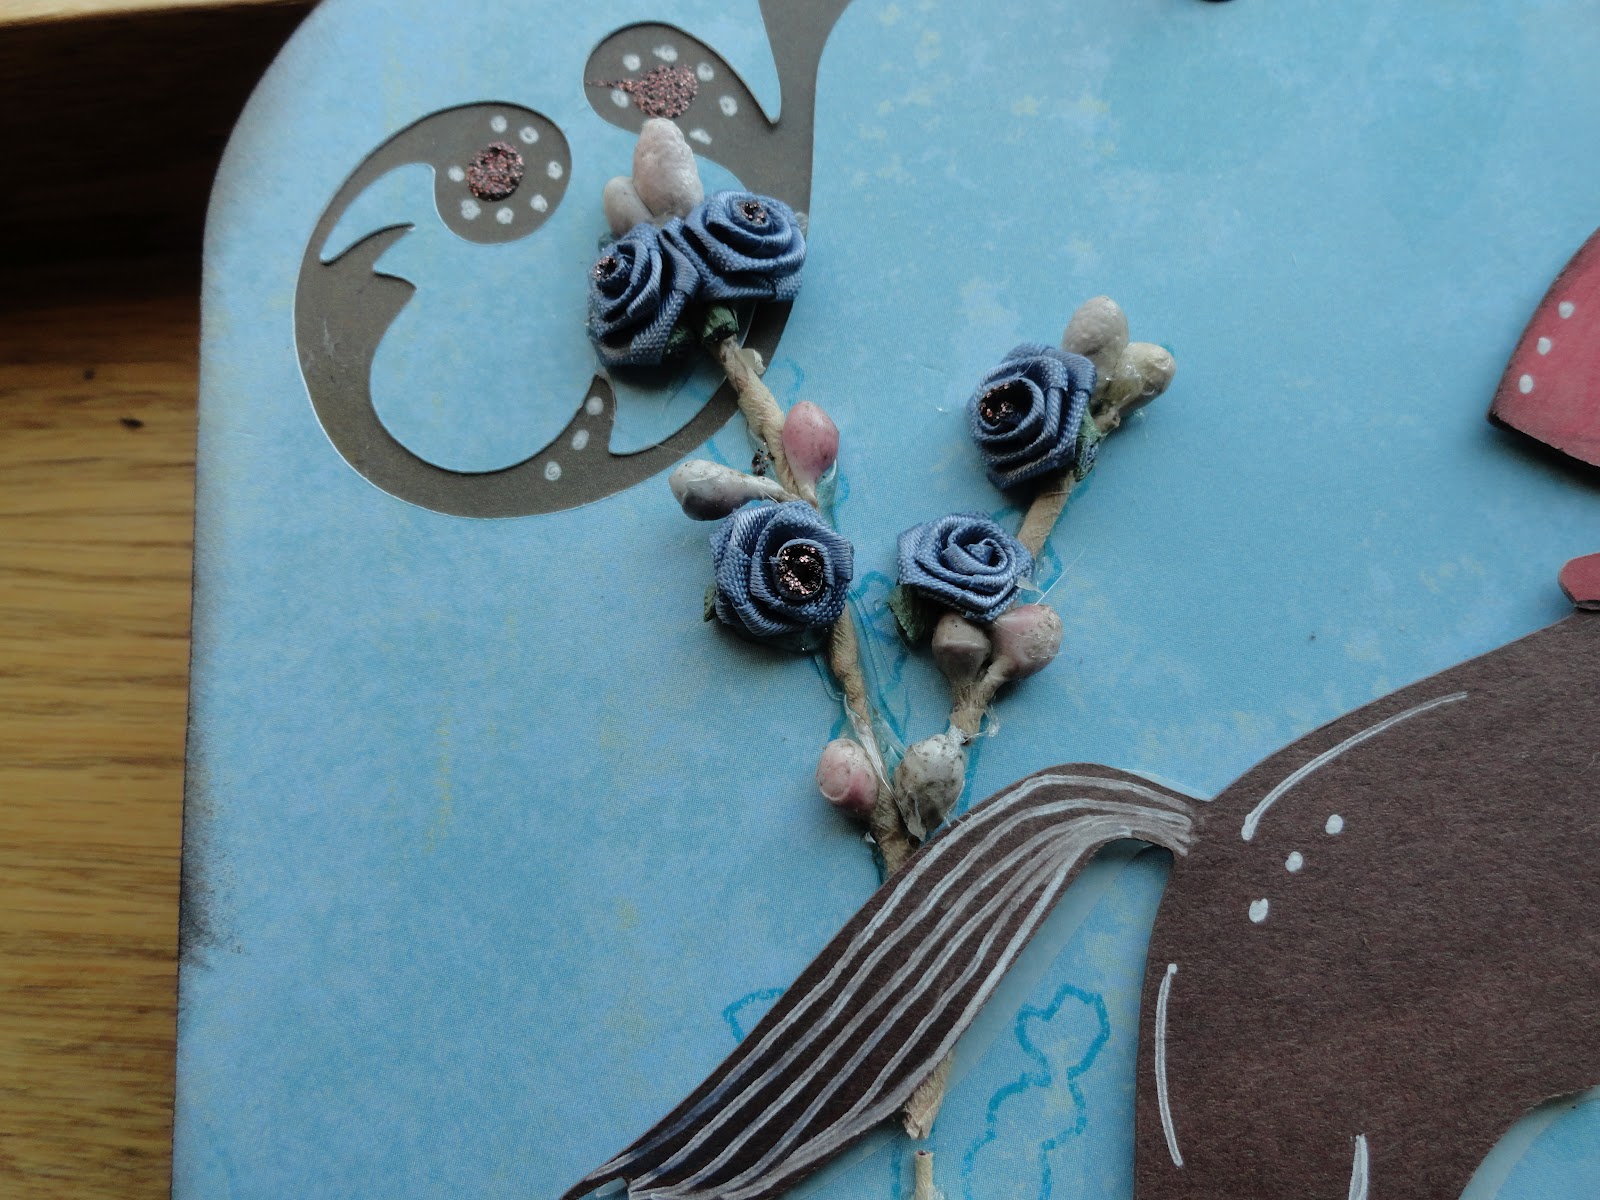
For this center piece I used the following supplies:
DCWV Rustic Pack 12x12 paper stack
Cricut Cartridges: Country Life, Doodle Charms, Elegant Edges
Cuttlebug folder Swiss Dots
Tim Holtz Distress Markers
gold Stickles
Lost and Found Brads. . .
Paper flowers by. . .
SVG file with Sure Cuts A Lot software
1/8" ribbon, various laces and lace flowers
When I cut the Cricut shapes, I used the flip button to cut out the piece for the backside. Even for the bottle. You would think the shape was the same back to back but its not and that's what I usually find except for true circles and squares.
I just packed up my first shipment to Operation Write Home. (OWH) They organize and send out cards made by crafters like you and I to our American Heroes in the Armed Forces to that they can write home. I found out about this group from fellow YouTube crafters and StampersBest.com. With my first order from Stampers Best, they sent a free Operation Write Home logo stamp that you stamp on the back of the cards that you make and send. Would you like to help out? Go the OWH web page and find out more. Be sure to check out the How to and Newbie videos and tips on just how this all works. I think it is a great idea and I wish I had known about them sooner so I would have had an outlet for all of the cards that I could have been making as well as helping out our American Heroes!!! Well, back to work on my next shipment of cards to Operation Write Home. Thanks for stopping by and have a great day. Amy
I found another old crafted item to recycle into new ones! I found this old "pillow" wreath that a friend made for me back in the 80s. Yes the 1980s. Now I need to figure out what to do with all those "pillows". Thanks for stopping by. Amy
I found these magnetic words while cleaning and decided to put them on a paint can that I have wanted to decorate. The can is decorated plus I can see the words so I can find what I need for my projects.
Here is a video with more information and other recycled craft supplies.
You can follow my blog and "Join This Site" with the link on the right hand side of the page.
Thanks for stopping by. Amy.
I watched a video on stamp masking technique posted by La Blanche stamps and I made this card using the Glitz stamp set "Dance in Sunshine" and the Tim Holtz "Admit One" stamp and Versa Mark black ink. I really like this technique because it is really simple to do, and it looks great and also looks complicated. I used a Tim Holtz Distress Marker "Spun Sugar" to color and tickets. The black ribbon is seam tape and one flat back pearl was used on the center of the bow. Below is a video I posted about the Making Memories Tag Maker I recently purchased from PeachyCheap.com (great site!), some info about the stamping technique and an announcement. I recently passed 200 subscribers on my YouTube channel (duke55925) and I'm going to do a giveaway so stay tuned!
I've been making large rosettes and creating different seasonal wall decorations for my cubical at work. (I also display YPP swap items.) The first one I made was for autumn.
Then I made one for Halloween. I am planning one for Thanksgiving, Christmas, Valentines' Day, etc.
Here are some cards that I put together using Cricut Lite Cartridge "Live Simple" and My Pink Stamper clear stamp sets, "Punnylicious" and "Buggy Licious"
A friend of ours has been giving me his wooden cigar boxes. His daughter asked if I would alter a box for her with a skull and cross bones theme. I went with the theme with a girly twist.
I have been on vacation this week and planned on going camping most of the week. But we have had very hot weather here to the point where I didn't really leave the house for 4 days. I was able to get this box altered and I will give it to Nikki later today when I get to the campground (finally). If you want to know how I made this and what I used, see videos Thanks for stopping by.
My daughter asked me to make a new door sign for her apartment door. She asked for a English fox hunting theme. Here is what I came up with. It measures 11"x11". I cut the shape from Elegant Edges Cricut Cartridge. The horse, rider and fence I cut with Sure Cuts a Lot (SCAL). I cut the shape out of Chocolate Chip card stock from Stampin' Up and cut shape out a couple of more times in red and black and pieced together the rider.
I used paper and silk flowers and leaves to decorate the My Mind's Eye paper.
The embellishments are from sets of brads also My Mind's Eye Lost and Found II collection I purchased from PeachyCheap.com I also used the Cuttlebug with wood grain folder on the fence for texture, white gel pen and brown glitter glue.
I hung a bell at the bottom with a round paper clip so that it rings each time she opens and closes her door. I added a pair of google eyes in the flowers--inside joke. lol
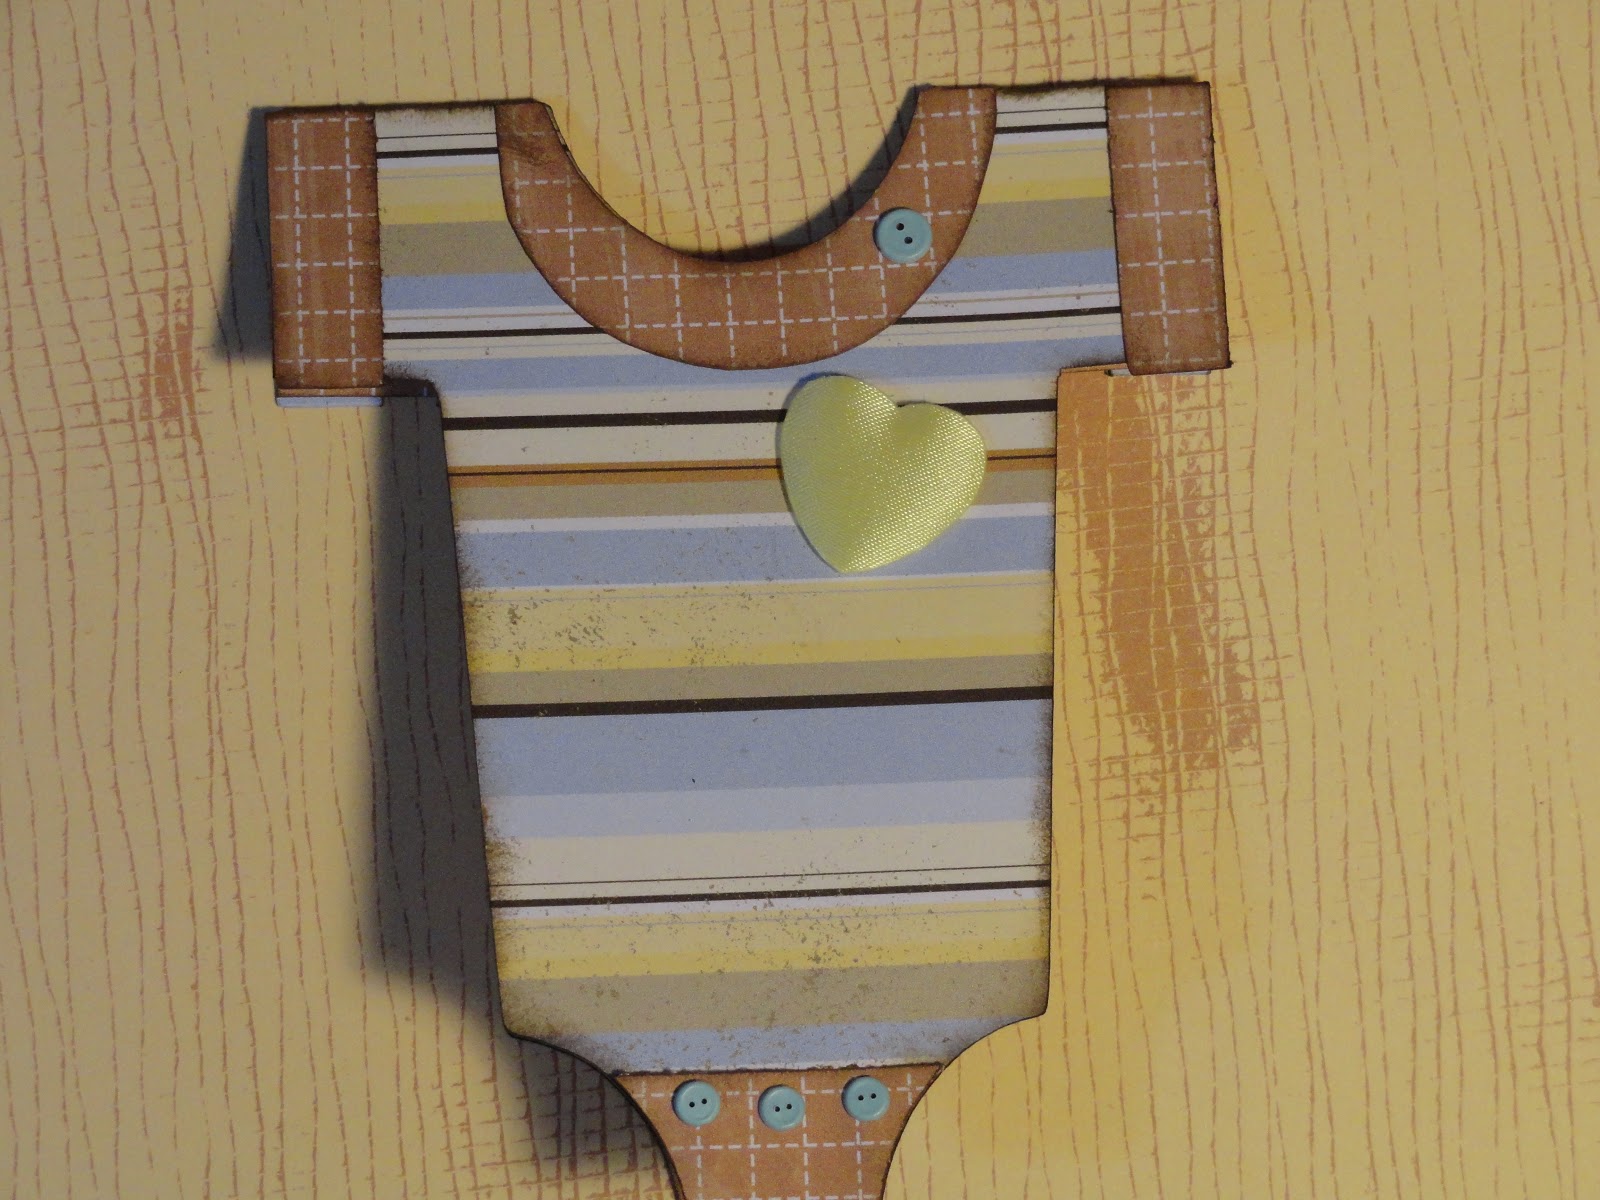
Onesie Baby Card made with Free SVG file and Sure Cuts A Lot (SCAL)
I used a free SVG file from RandomCreativity.wordpress.com and altered it with Sure Cuts a Lot. I used a Stampin Up 2 sided paper, walnut stain Distress Ink, button brads and a padded heart. I cut two cards and then used parts of the second one to create the accent pattern on the sleeves, around the collar and at the bottom. The video below shows how I created the card using SCAL and welding the shape to make a card as wel as making it fit into a standard A2 envelope. Thanks for stopping by.


.png)


